Sunday 28 December 2014

Swiss Cross Block Pattern

Here is the Swiss Cross block outlined step by step, a gift to my fellow quilters.  I had hoped to have it ready to post on Christmas Day but here it is all the same...  I did make a slight revision to the original pattern I posted earlier when I realized that the red cross was made up of only three pieces, instead of the 5 originally noted.


Swiss Cross Block Pattern - finished size 15" square

Step 1:

Cut the following...
for this pattern I am using red and cream but any colour combination is possible

Fabric A (red)

1 @ 3 1/2 x 9 1/2"
2 @ 3 1/2 x 3 1/2"

Fabric B and C (two shades of cream)

Cut for EACH fabric:
2 @ 2 x 3 1/2"
4 @ 2 x 6 1/2"
2 @ 2 x 15 1/2"

You will end up with the following cream (or equivalent) pieces in total:
4 @ 2 x 3 1/2"
8 @ 2 x 6 1/2"
4 @ 2 x 15 1/2"


Arrange pieces


Step 2:


Sew 2" strips together as shown


Step 3:


Continue to sew sections together, making sure to lay them out if you are wanting a specific repeat in the background


Step 4:

TA DA !


Turned so the strips are horizontal

Two blocks done !


Please let me know what you come up with :) and send me your pictures.  This pattern is simple, good for beginner and experienced sewers alike.

Merry Christmas and Happy New Year !

Monday 22 December 2014

Do You Want to Quilt a Frozen? ... or two


You may have heard about this movie Disney recently released... Frozen.  Honestly unless you have been living under a rock, or holed up in your house, you have happened across the Frozen Phenomenon.  My children are too old to be really interested in it, but even my son has taken to singing Olaf's words of snow in summer, again and again and again.

So did I think I would avoid getting on this particular icy bandwagon?  I confess I did, more fool me. Recently a friend contacted me to long arm a Frozen quilt for her, in fact two, one for each of her granddaughters.  My first thought was oh great, as I believed myself above the commercialism of Disney. Wrong again !

I googled the pattern to see what I was in for.  It seemed pleasing enough however I could not find any detailed pictures to show the quilting to give me a clue of where to go.  Luckily my daughter showed me a few clips of the movie and a video of the song Let It Go and we were off.

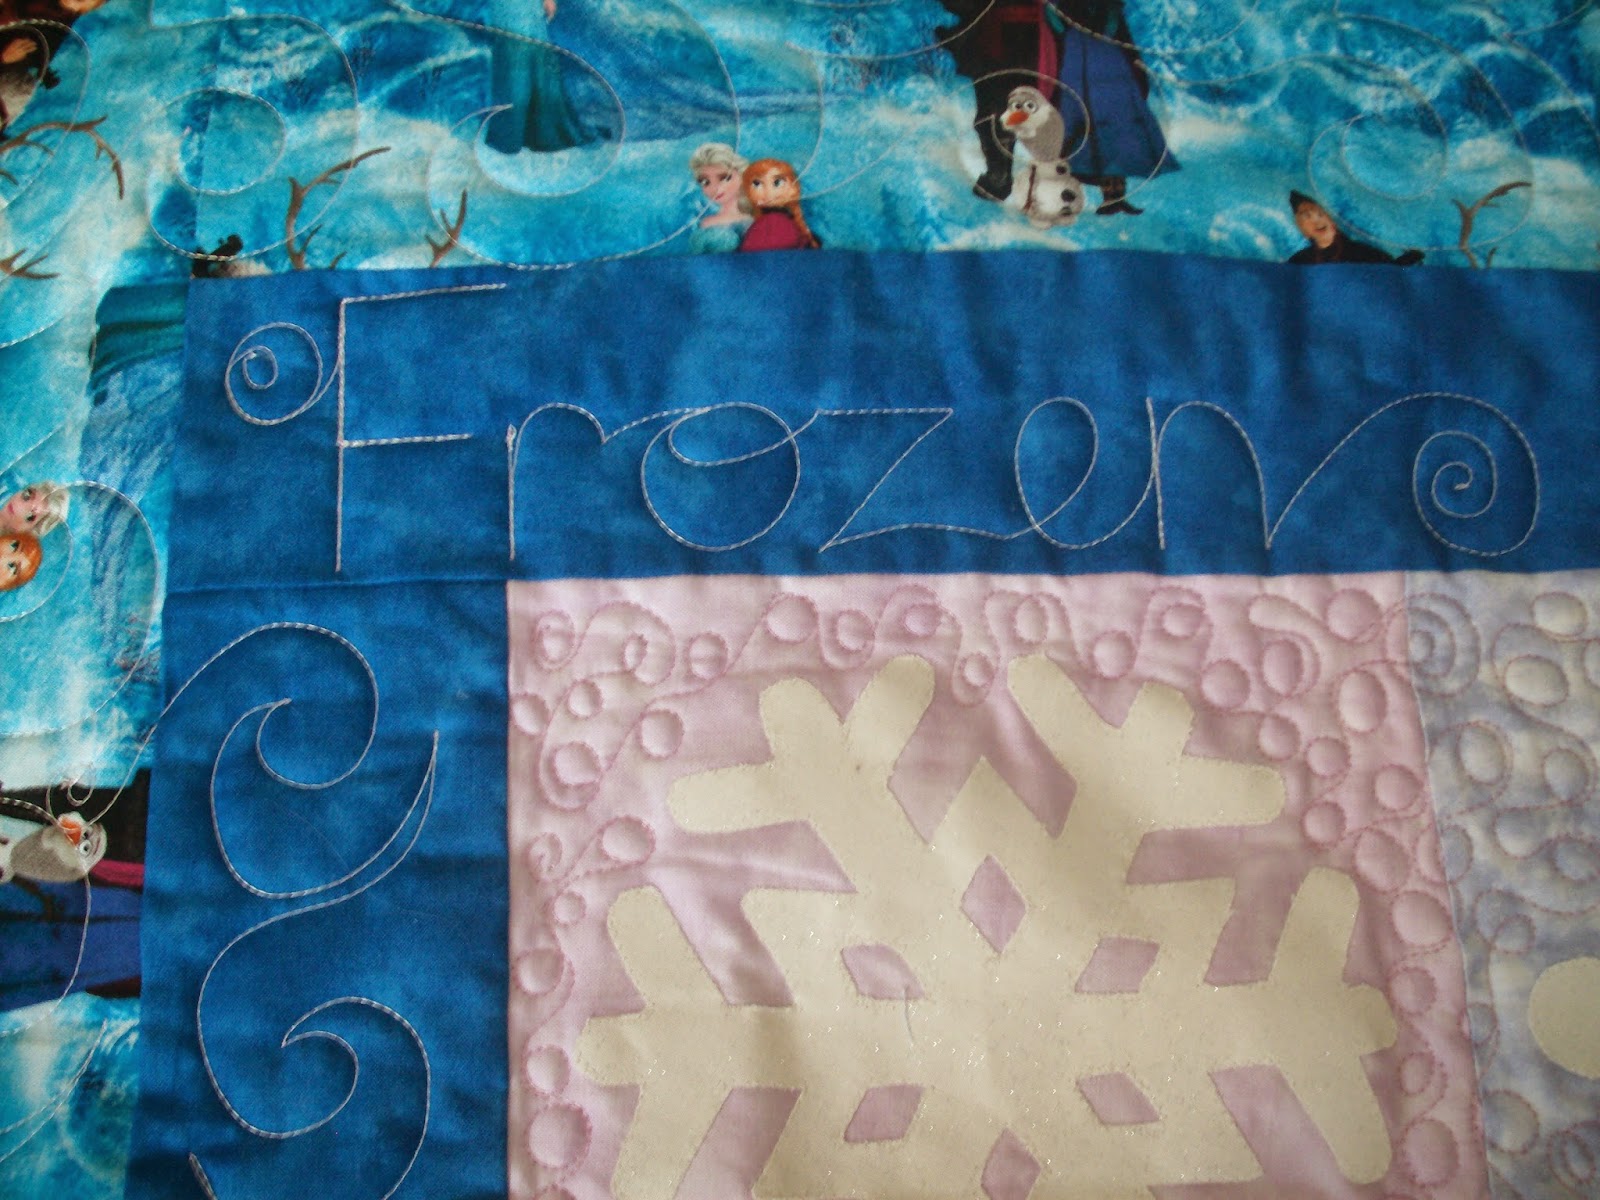
I made a swirly wind pattern for the border, a regular repeat of the same for the inner borders, tiny swirls for around the snowflakes... the fabric is encrusted with glitter so I was keen to avoid trying to quilt over that.  I added the words Frozen, Do You Want to Build a Snowman?, Let It Go... Elsa, Anna, Olaf, Kristoff, Sven and Hans (at my friend's request), all in the inner blue borders.  Finally I silhouetted the panel in the middle with various patterns, avoiding the faces as I had avoided the snowflakes.  Quilting faces can be a dangerous territory, either working well enough or going horribly wrong.  Luckily my friend was in agreement on this and I quilted as close as I could get without entering the facial danger zone.

This turned out to be WAY more fun than I thought it would be, even to do it twice.

I had looked up the song Do You Want To Build A Snowman? a sad but catchy little song and I found myself humming it over and over (not unlike my son) as I quilted.  This quilt had all the hints I needed in the fabric and in the songs, I only had to open up my imagination to let everything play together.

I hope that the girls who receive these lovely quilts from their Grandma feel the whimsy and happiness I felt quilting them.


Thursday 4 December 2014

First Aid Cross Block

I made a visit to the church whose red front doors inspired me to make my church door quilt... St. John's Anglican Church in Ancaster, Ontario, Canada.  I was given a tour and saw the gorgeous interior, the breathtaking stained glass windows and the beautiful carved wood beams.  It was heaven ;)

As I looked around absorbing the multitude of patterns, motifs and designs I spotted an old first aid cross flag, it drew me across the church immediately. I think it dated from 1932.  It is made of linen.  I fell in love with the construction they used in making the cross, strips instead of square pieces.  I was entranced...  you could even see the hand stitched repairs from where holes had been made, maybe in nailing the flag up somewhere as they were in each corner.  What history this flag must know... (I have an Honours History degree from Laurier, you can NEVER take the historian away from the history).

I quickly jotted it down in my notebook and I worked a block pattern up this morning from my hastily scribbled notes, complete with red crayon to colour with :) honestly who does not love colouring with crayons !

I am going to make candle mats for my family in this pattern (for Christmas... using what I already have) but of course it could be worked up into a table runner or a full size quilt.  This block measures 15 1/2" unfinished.

I need to get back in that church and get a photo of the original flag to post it here :)


Step One: Draft pattern from scribbled notebook


Step Two: cut out fabrics and audition on design wall

Step Three: the completed block